5 Main Bosses Boss-Safe Loadouts Verified Apr 17-24, 2026

Bosses / Builds Bridge

Pragmata Boss Builds Guide

This page connects the stable overlap between the main boss guides and the broader builds guide. The goal is not to force one rigid meta, but to show which loadout pieces reliably recur when current coverage talks about safer boss clears: short-window burst, cleaner hacking paths, and enough defensive margin to survive a bad phase.

Most repeated boss tools
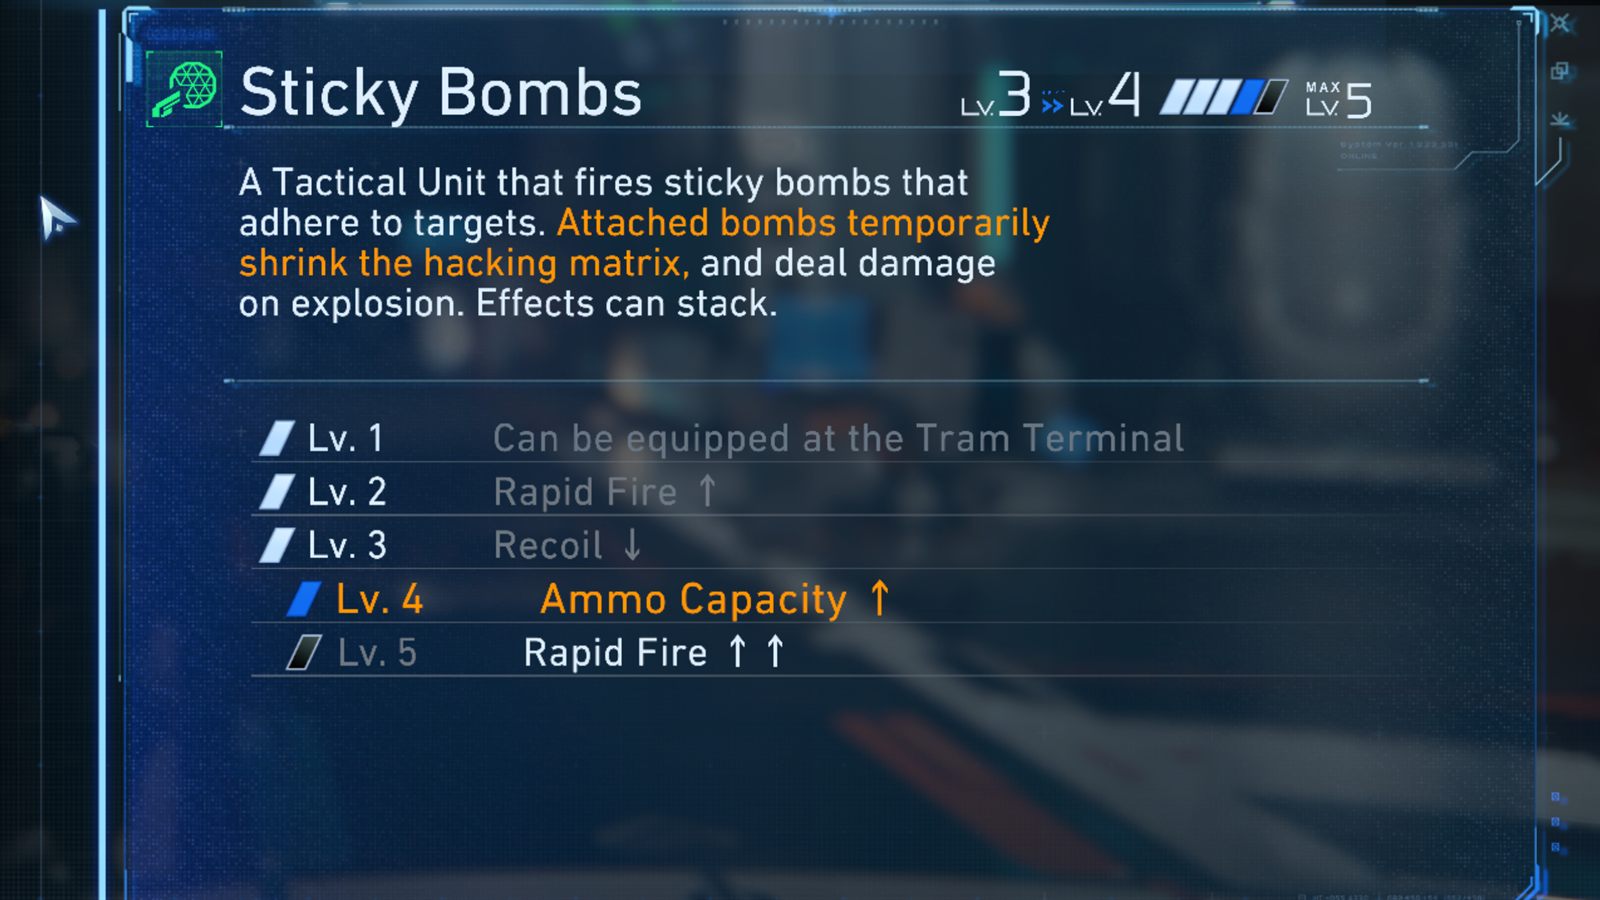
Charge Piercer, Sticky Bombs, and Decoy Generator show up most consistently when boss loadouts are discussed.
Boss fights are window fights
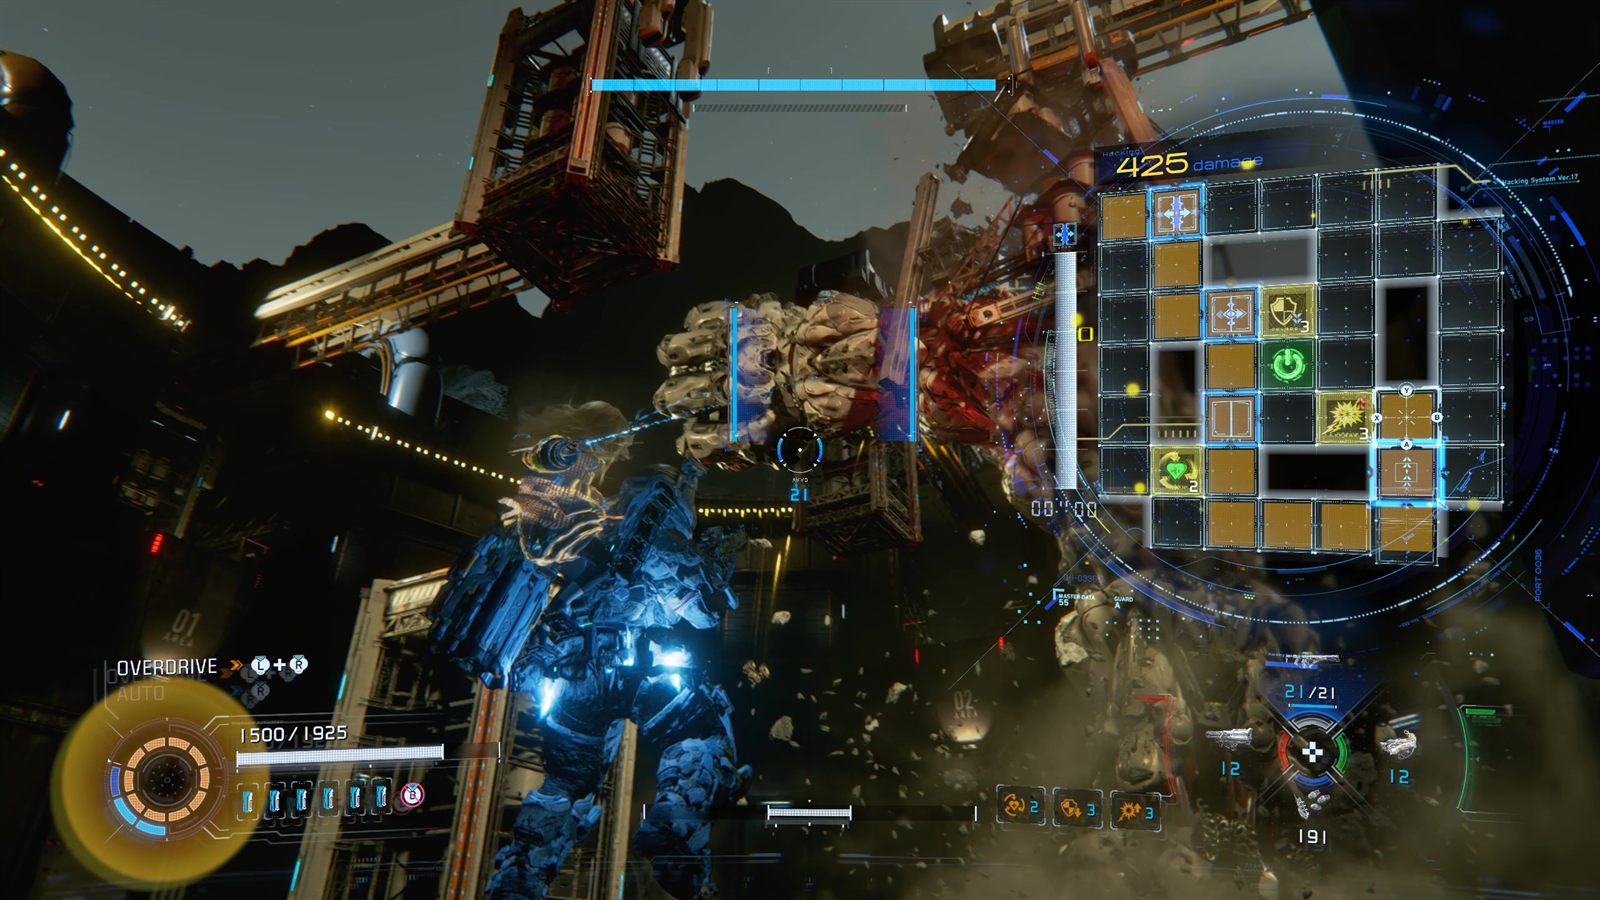
Public boss coverage repeatedly describes short punish windows after hacks or weak-point exposure.
Swap Tactical first
If your hack route is the problem, changing Sticky Bombs, Stasis Net, or Code Generator usually matters more than changing Primary.
Final boss confidence is lower
The safest overlap around Idea or Eight is late-game matrix pressure, not one fully unanimous four-slot list.

Default Primary

Pulse Carbine

The safest late-campaign boss anchor when you want a stable, all-purpose ranged core.

Burst Pick

Charge Piercer

The most repeated single-target boss recommendation across current weapons and boss guides.

Hack Support

Sticky Bombs

Often recommended because it makes hard boss matrices easier to convert into clean damage windows.

Defensive Core

Decoy Generator

The broadest safe fallback when a boss setup starts breaking down under pressure.

// Build Logic

How Boss Builds Differentiate

1. Bosses Reward Conversion, Not Just Raw Damage

Current guides are most aligned on one principle: you need to survive the hack, expose the boss, then cash out quickly. That is why boss loadouts keep circling back to burst and matrix support instead of pure room-clear tools.

2. Attack and Tactical Slots Matter Most

Boss-specific advice usually changes your Attack and Tactical tools first. Primary keeps the run stable, while the swap pieces decide whether a given fight feels controlled or messy.

3. Late Bosses Increase Matrix Value

The farther you get into the campaign, the more coverage leans toward Sticky Bombs and Code Generator style support, especially once boss phases start stacking more movement and hack pressure at the same time.

// Safe Core

Safest Universal Boss Build

Default Loadout Direction

Pulse Carbine + Charge Piercer + Sticky Bombs + Decoy Generator

This is the best one-page answer if you want a boss build that stays useful across all five main fights. It mirrors the strongest overlap between current build guides and boss writeups: stable ranged pressure, high-value burst during short openings, lighter hack friction, and a defensive reset button when the arena gets ugly.

When to use Shockwave Gun instead: early or midgame bosses that let you stay close, especially SectorGuard, can reward a more aggressive short-range burst swap.
When to use Stasis Net instead: if the boss itself is manageable but the hack setup feels rushed, the safer move is often to slow or stabilize the window rather than chase more damage.
When to use Code Generator instead: late-game fights and the final boss are where build coverage most clearly shifts toward extra matrix help.
Charge Piercer weapon screenshot illustrating a high-burst boss build option in Pragmata
Charge Piercer is the most stable boss-burst recommendation on this page, so it earns the main weapon image slot.

// Matchups

Boss-by-Boss Loadout Direction

Boss Safest Build Direction Why It Fits Best Internal Link
SectorGuard
Solar Power Plant
Grip Gun or Pulse Carbine + Shockwave Gun + Stasis Net + Decoy Generator Current coverage treats SectorGuard as the first hack-to-burst tutorial, with close-range punish windows and a back weak point. SectorGuard boss guide
Creator
Mass Production Array
Pulse Carbine + Charge Piercer + Sticky Bombs + Decoy Generator Creator pushes longer arena control and face-window burst, so the safer direction is stronger single-target punish with cleaner matrix routing. Creator boss guide
Garden Keeper
Terra Dome
Pulse Carbine + Charge Piercer or Photon Laser + Sticky Bombs or Code Generator + Decoy Generator Most guide overlap describes a fast boss with a tail-focused damage plan, which raises the value of precision burst and matrix simplification. Garden Keeper guide
LunaDigger
Lunum Mines
Pulse Carbine + Charge Piercer + Sticky Bombs + Decoy Generator LunaDigger offers brief openings in a low-gravity end-of-sector fight, so stable ranged control plus fast burst remains the safest repeated theme. LunaDigger guide
Idea or Eight
Central Port
Pulse Carbine + Charge Piercer + Sticky Bombs or Code Generator + Decoy Generator Reliable overlap is strongest around higher matrix pressure and multi-phase strain, so the safest final-boss swaps prioritize consistency over greed. Idea or Eight guide

// Fight Notes

Why Each Swap Works

Sticky Bombs weapon screenshot illustrating hack-support value in Pragmata boss fights
Sticky Bombs are featured here because late-campaign boss advice repeatedly leans on matrix simplification.
LunaDigger boss screenshot showing a late-game fight where precise burst and stable movement matter
LunaDigger is a good visual example of why short-window burst and stable ranged control matter more in late boss fights.

SectorGuard: Learn The Loop, Then Cash Out Fast

SectorGuard is still the cleanest example of Pragmata's core boss language: hack the target, expose a reliable weak point, then punish hard before the window closes. That is why more conservative first-clear advice repeatedly favors Shockwave Gun and Stasis Net.

Best use case: if you are entering the first real boss with limited confidence, build for control first and let the damage come from clean windows instead of greed.

Creator: Keep The Burst, Respect The Arena

Creator is where the game starts punishing weak setup discipline. Coverage most often emphasizes the face weak point, the arena-control burden, and the need to clear disruption before trying to score. That naturally favors Charge Piercer and Sticky Bombs over room-clear tools that do not convert hard enough.

Build mistake to avoid: loading too hard into crowd clear and then discovering your real boss window still feels underpowered.

Garden Keeper: Precision Beats Comfort

Garden Keeper tends to push dodge timing and tail-target discipline harder than the earlier bosses. Because current boss coverage repeatedly points players toward the tail for better damage, this fight rewards more precise burst tools and any Tactical piece that keeps the matrix from getting messy during fast phases.

Safe direction: keep one precise ranged burst option, then decide whether your second swap needs more matrix help or more emergency safety.

LunaDigger and Idea or Eight: Build For Pressure, Not Theory

Late-game boss coverage grows less unanimous on one perfect four-slot list, but it stays consistent on the direction: keep a stable ranged core, preserve short-window burst, and add matrix support instead of overcommitting to fragile damage. That is why Sticky Bombs, Code Generator, and Decoy Generator keep showing up around the end of the campaign.

Final boss rule: the safest advice is to arrive prepared and finish any side cleanup you care about before the fight, because multiple guides treat it as the push into the ending sequence.

// Swap Logic

When To Change Your Boss Build

If the window is too short: move toward Charge Piercer or another precision burst option.
If the hack path is the real problem: change Tactical first, usually toward Sticky Bombs, Stasis Net, or Code Generator.
If the arena feels noisy: keep Decoy Generator in the defensive slot and stop trying to solve every wipe with more damage.
If you are near the endgame: bias toward consistency, because the last two boss pages are where coverage becomes less unanimous on niche optimizations.

// Related Guides

Continue With Related Pages

// FAQ

Boss Builds FAQ

What is the safest boss build in Pragmata?

The safest broad direction is Pulse Carbine, Charge Piercer, Sticky Bombs, and Decoy Generator, then swapping one slot for Shockwave Gun, Stasis Net, or Code Generator when a specific boss asks for more control.

Which boss benefits most from Charge Piercer?

Current overlap is strongest around Creator, LunaDigger, and the final boss, because those fights are frequently described as short-window punish encounters where precise burst matters more.

Should I swap Primary or Tactical first for bosses?

Usually Tactical first. If the hack route is what keeps failing, current guide overlap points to Sticky Bombs, Stasis Net, or Code Generator as the cleaner fix before you change your Primary weapon.

Do I need a different final-boss build?

Not a completely different foundation, but current coverage does lean harder toward matrix support for the final fight, which is why Sticky Bombs, Code Generator, and conservative defensive swaps rise in value there.